Showing posts with label Nail Art. Show all posts

Tuesday, July 2, 2013

Neon Sprinkles

Hi guys,


I painted these nails a week ago on a whim. Didn't really have much of a plan, just went with it. Hope you enjoy.


Friday, June 14, 2013

Nail Art Inspired by Finger Painted (blog)!

Hi guys!

I watched this video done by a blogger I really like. Her name is Lexi and her blog is linked here!

Also.... her video is linked here!

I followed some of her techniques and stuff to replicate her design and this is how it came out. I used a white by Sally Hansen and acrylic paints. For the blue nails, I used a Quo by Orly polish called Turquoise Moonlight.

Hope you enjoy! Thanks for reading.


1st attempt

1st Attempt

2nd Attempt

Tuesday, June 4, 2013

NOTD Glitter Layering

Hi guys!!

You haven't heard from me in a while. That's simply because I've been really lazy and found it hard to be motivated to blog as frequent as I used to but I'm back today and that should be worth something!

I have a glitter manicure on today and it actually features 3 glitter toppers! It has NYC In a Minute Blackula (black base colour), CND Effects Amethyst Sparkle (purple fine sparkles), Sapphire Sparkle (blue fine sparkles) and Wet n Wild "Wild Shine" in Kaleidescope (silver hex glitter, $1 from Meijer).


It kind of reminds me of the galaxy manicures I've been seeing. It's becoming quite popular. But this requires no sponging which essentially means no need for sponges and the extra clean up! I like it alot because it's so sparkly and fun. It's an excellent recreation of galaxy nails.

There is one more thing though.... I cannot take credit for this layering combo. I must thank the most precious person in my life for coming up with this idea! I love it so much!

Hope you are all having a good day/week so far!

Tuesday, May 14, 2013

Yellow Stripes

Bored one night and decided to do simple stripes on my nails. I used Sally Hansen Complete Salon in Yellow Kitty and both yellow and white striping (NOT stripping lol) polishes. You know, the ones with the thin brushes. Hope you all are having a good week so far.


Sunday, April 14, 2013

Compilation

Hi everyone.

I've just been doing some nails related stuff the last few days but haven't gotten around to posting it on my blog. So here is a mish mash of all I've been up to.

Two nail wheels complete with some amount of nail art though I'm not very pleased with some nails. Such as the nail between the pink flowers and yellow stripe on a green background. That one bugs me. It was supposed to be tulips but looks nothing like that.

Here's my second nail wheel. This wheel was inspired by Madeline Poole, a nail artist from LA. I'll link her pic here.
And here's a set I did for a close friend of mine! I'm so glad she enjoyed it :)
And as for myself, I did the spilt nails because it's just so simple but still fun.


Thanks for looking!

Saturday, April 6, 2013

Multicoloured Nail Designs with Stripes

Hi guys... I'm posting a few pictures of some nail art I did. It's really simple. Hope you enjoy.


Thursday, March 14, 2013

Nicole by OPI Bah-Plum Bug!

This one is a plum purple with a slight red shimmer. Opaque in 2 coats.

Bah Plum-Bug! is one of the first polishes I ever owned. It was in a sale bin at Shoppers and being that I wasn't too interested in nail polish at the time but nonetheless, it was on sale so I picked it up. The shimmer is subtle yet still noticeable if you look at it up close. When I first used it, I was pleasantly surprised at this somewhat hidden shimmer.

I can't believe for a bottle so old it is still holding up.


And I got inspired by a few people (The Swatchaholic & Chalkboard Nails & Gorgeois) to do nail art with this colour as the base... Take a look!

There's no second layer of top coat but the pictures above have one so this design was done with this base colour Nicole by OPI Bah plum-bug, top coat and then a layer of acrylic paints (I used magenta, green and yellow!)


Monday, March 11, 2013

Pastel Leopard Print Nails

Hi everyone

I did a multicoloured design today with the leopard print on Konad Stamp no. 57 and Konad Black Stamping Polish.

Blue: Sally Hansen Complete Salon Manicure in Barracuda
Yellow: Sally Hansen Complete Salon Manicure in Yellow Kitty
Green: China Glaze Re-fresh Mint
Pink: Sally Hansen Tickled Pink
Purple: Sally Hansen Xtreme Wear in Lacey Lilac


I wonder: Are people still interested in nail art stamping anymore?

Thursday, March 7, 2013

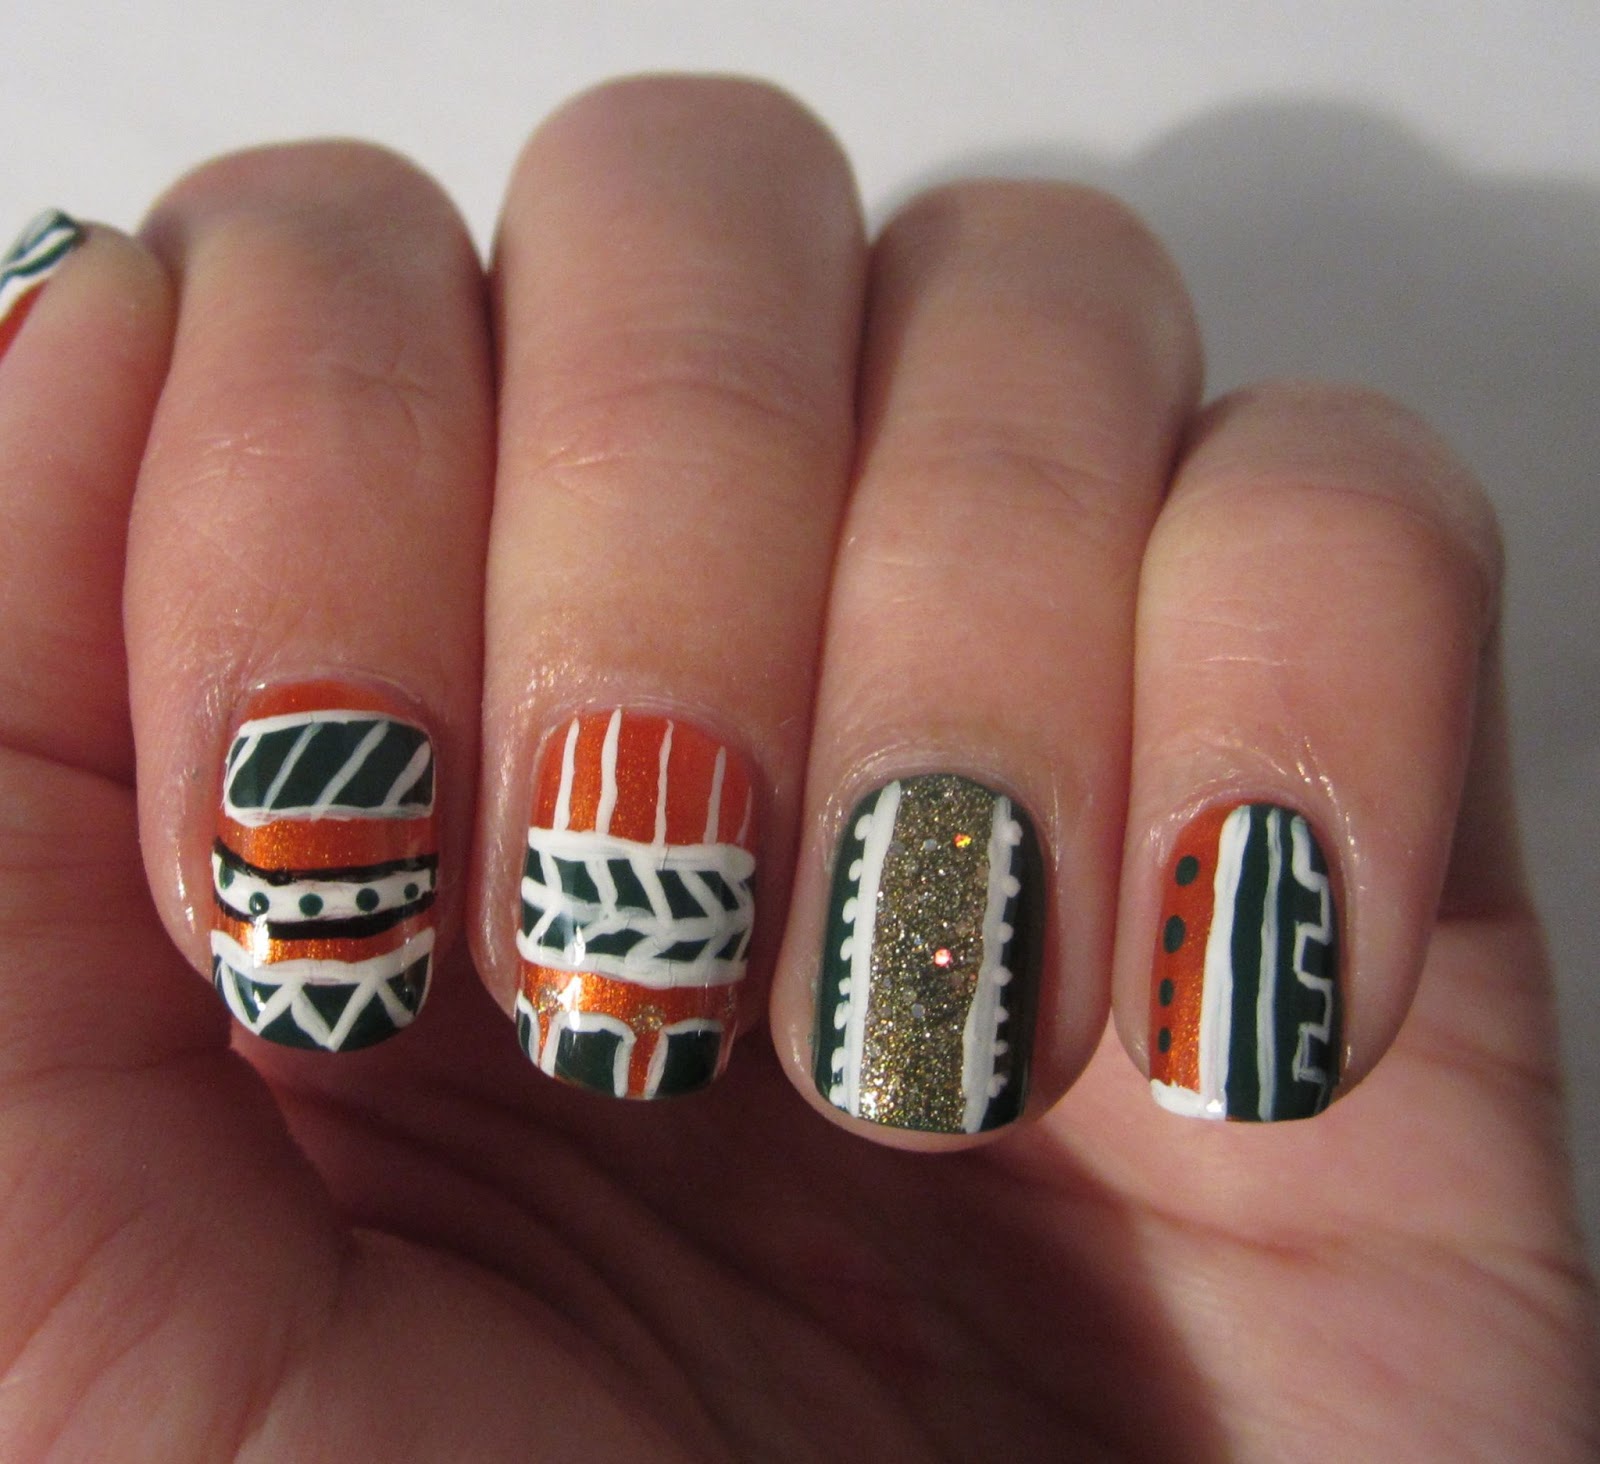
Tribal Nails


I was inspired by this nail art wheel I found on Instgram done by Allison Davey of Pinky's Nails, a local nail art studio in the city. I was also inspired after watching a video by Robin Moses called Indie Chic. The design itself is really intricate and detailed so I was scared to try it at first but I challenged myself and just went for it. I hope it looks okay :S

I used Sally Hansen Hard as Nails as the orange-ish gold and Essie Going Incognito as the forest green. The gold is a Forever 21 Love & Beauty polish. Anddd some acrylic paint in black and white. Also a fine stripper brush. Unfortunately I don't know the name of the orange cuz I polished over the label on the cap :s

So... What do you guys think?

UPDATE: I smudged my thumb and was unsatisfied with my index finger for the longest time so I changed those two nails.

Tuesday, March 5, 2013

My First Nail Art Wheel

Hi guys,

I was browsing around for the Toronto nail scene and came across some blogs that showcased nail art wheels and I thought hm.... I could do that. So that's what I did. These are really basic, nothing too elaborate but yeah :) Enjoy!


Wednesday, February 20, 2013

Cupcakes

Products used:

Sinful Colors Pink Forever
Sally Hansen Tickled Pink
Sally Hansen White On
Cheeky Monkey Man Eater
2 Dotting tools
Stripper brush
Nail Polish Remover

Inspiration

the most Awesome Simply Rins

Wednesday, February 6, 2013

Essie Smokin' Hot

Hi everyone, I did a glitter gradient. I used Smokin' Hot, Sally Hansen Celeb City and silver rhinestones from Born Pretty Store
Hope you enjoyed looking
-Kitty

Thursday, January 31, 2013

Microbeads Manicure (finally Yay)!

Hi everyone, another post tonight because I did this tonight. Actually my friend's manicure I did it last night. So here is tonight's manicure on my own hands because I had wanted to experiment with microbeads nails or "caviar nails" for the longest time! I just never got around to it. This is a good thing to do for the final post of January because it is so intriguing to look at. It reminds of tadpole eggs for some reason or some kinda fish eggs. That must be why it's called "Caviar Nails." Lol duh!

I pretty much painted OPI Let Me Entertain You (from a past collection called Burlesque) and Love and Beauty purple nail polish. I think the two colours go really well together because they're in the same family and have red in common. They're also really sparkly and cute.  Then I added a microbeads which are extremely extremely tiny beads. Probably the most tiny beads I have ever witnessed. I show you picture below :)

 As you can see, a part of the wheel have mixed up beads, which I really don't like because it kind of defeats the purpose of the wheel container it comes with. I used the beads second from the right and sixth from the right.

I know from some of the pictures below that my beads didn't quite distribute over the whole entire nail on my ring finger and that one has some fading. That is because I've actually never done it before, the next time I do this technique I have to remember to go on easy on top coat and to make sure that the edges are covered with beads. Another issue I got was the blue/purple beads showed more blue than I was expecting which is not that big of a problem but it kind of clashed with the pink/purple already on the nails.
As always, thanks for reading 
-Kitty

Valentines Day's Manicure

Hi everyone, I did a little manicure for a friend of mine since she was travelling and I had some free time. We actually had no idea what we were doing beforehand so this design was decided on the spot. It's basically just a couple of hearts done with a dotting tool. What I did was I painted Nfu Oh #064 as a base or bankground colour and Sally Hansen Tickled Pink, Cheeky Monkey Man Eater and OPI Chop-Sticking to My Story for the hearts. I had to add a top coat only because I wanted the manicure to last longer though it didn't really seem to work because after only a day, it already chipped. That's disappointing but I guess it is expected with holographic/prismatic polish. Hope you enjoy looking -Kitty

Wednesday, January 30, 2013

China Glaze For Audrey Leopard Print Design


Hi everyone, just a quick update on my current manicure. I used my dotting tool for the first time and a black polish. I couldn't believe how easy it was to do leopard print because before I used to use like a pen device and it would always hurt my hand. This time with a dotting tool it was so easy. I guess because I didn't have to be constantly squeezing. The tool I used was called a two-way nail art pen.
(Image Source: http://www.nailsandbeautydirect.com/nubar-two-way-nail-art-pen---neon-fuchsia-543-p.asp)


http://www.nailsandbeautydirect.com/ekmps/shops/nailsbeauty/images/nubar-two-way-nail-art-pen-neon-fuchsia-543-p.jpg
Here is how my manicure came out. I added a little glitter for some pizzazz. -Kitty